Take, mark up and share photos
Photos show the office and the customer what you found and what you fitted, and a photo of each installed item can be part of signing off the job.
Steps
On the phone
- For a photo of the whole job, tap Photo on the job. The camera opens straight away.
- For a photo of one item, open the job's items, tap the item, then tap Photo. For a task, open it and tap Photo of this task.
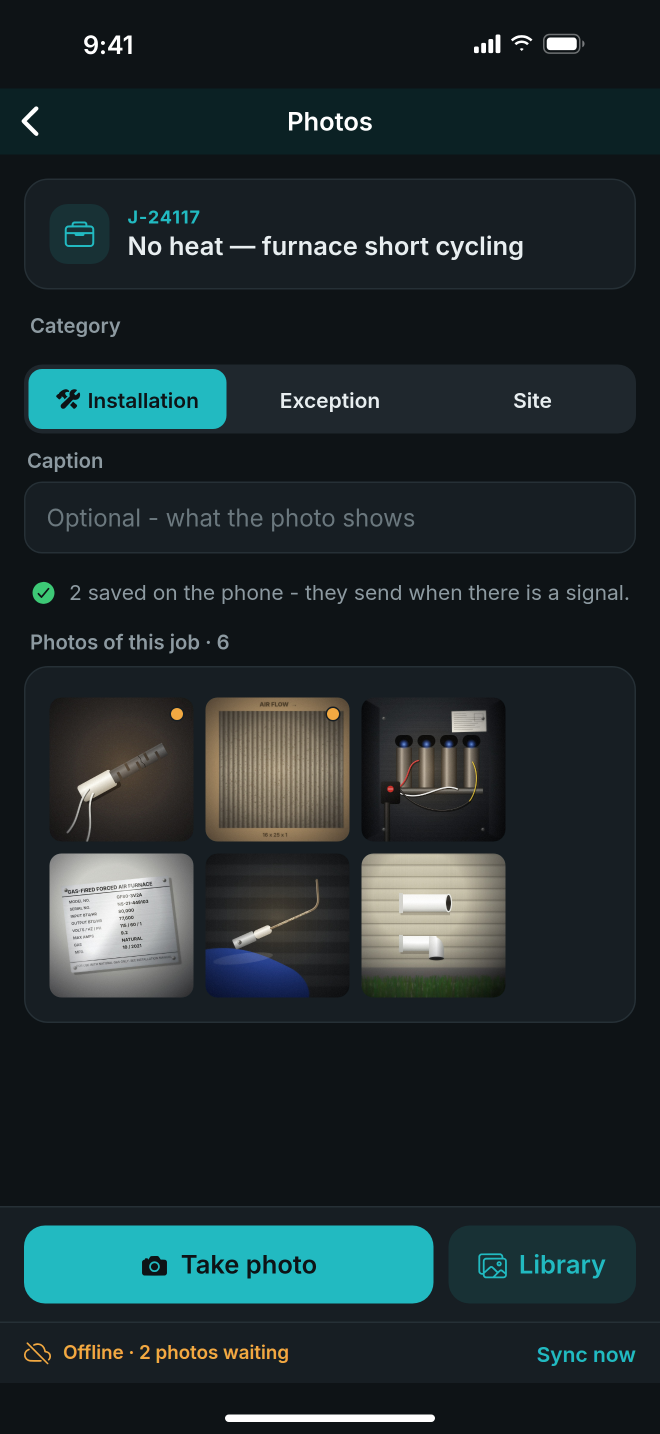
- On the Photos screen that opens, choose a category: Installation, Exception or Site. Add a Caption if it helps.
- Tap Take photo, or Library to choose one already on the phone.
- To draw on a photo, tap it to open it, then tap the brush. Choose Draw, Arrow or Circle and a colour, mark the photo, and tap Save drawing.
In the office
- Open the job on the Jobs tab and scroll to Photos.
- Tick show them under each photo the customer should see.
- Click Email the photo report, add a line of your own if you like, and click Send.
Good to know
- Attach to this item is ticked when you start from an item. Leave it ticked and the photo counts as that item's photo at sign-off.
- A photo is saved on the phone the moment you take it, and sends when there is a signal. Until then the job shows it as waiting, or how much has been sent.
- The drawing sits on top of the photo. The photo itself is never changed, and the undo and clear buttons remove what you drew.
- You can draw on a photo that has not uploaded yet. A photo that is already in the office needs a connection to draw on.
- The office sees Drawn on next to a photo with a drawing.
- Nothing is in the customer's photo report until someone ticks it. Owners, managers and dispatchers can tick photos. Signatures can never be shown.
- Ticked photos appear on the customer's own page under that visit.
- Your company can also save a copy of each job photo to your phone's own photo library, as a backup until it uploads. An owner or manager turns this on under Sign-off rules on the Crew tab. The phone asks your permission to add photos to your library.